Deploying Jenkins on an AWS EC2 instance
How to Deploy Jenkins on an AWS EC2 instance

I'm Varchasv, a Data Engineer working on enterprise data integration.
Currently on a 90-problem challenge to level up my technical skills and switch to a more development-focused role.
What I'm doing:
- Solving 2 Leetcode problems daily (SQL + DSA).
- Blogging about each problem.
- Building in public.
My Goal - Land a better data engineering role by mid-2026.
Follow my journey !!
Welcome back Folks, Today we will be deploying Jenkins on Cloud using AWS EC2 instances. I hope you guys find this blog helpful and intriguing.
Introduction
Before we jump to the Demo, we must first understand what exactly is EC2
AWS EC2 stands for Elastic Cloud Compute.
Elastic: A resource that can be scaled up or scaled down.
Cloud: Available on the Internet/Cloud.
Compute: We request a virtual server from AWS that contains CPU, RAM and Disk.
Types of EC2 instances
There are a total of 5 types of EC2 instances.
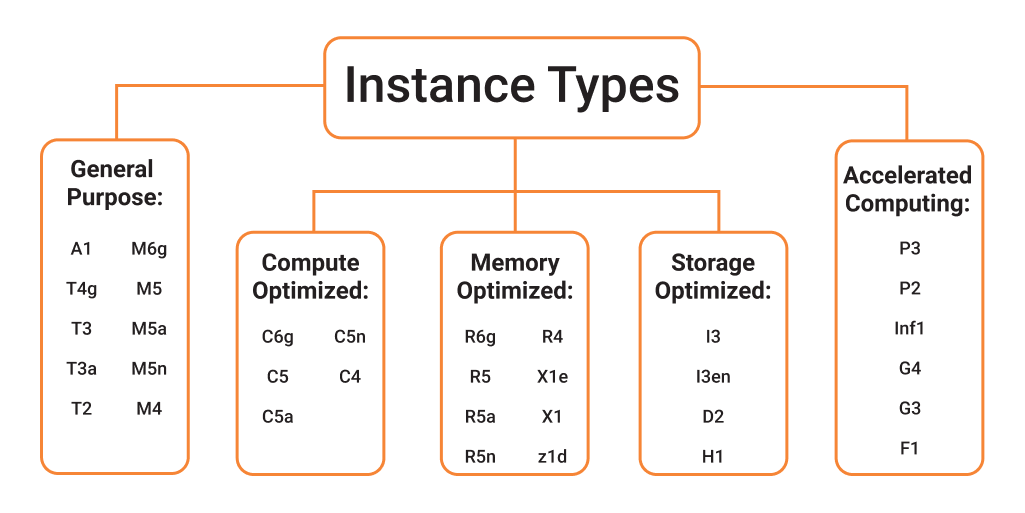
General Purpose: Variable workloads, small websites, development/test environments.
Compute Optimized: Compute-intensive tasks, analytics, web servers.
Memory Optimized: Memory-intensive applications, databases, and big data processing.
Storage Optimized: Machine learning training, video transcoding, GPU-intensive workloads.
Accelerated Compute: High-speed local storage, NoSQL databases, and data warehousing.
Demonstration
Finally, we are at the demo but we need to set a few things up before:
Creating an EC2 instance
Step 1: Search EC2 in the search box and Click on 'Launch instance'.
Step 2: Name the instance 'jenkins-deploy'.
Step 3: Create a t2.micro instance with Ubuntu OS installed in it.
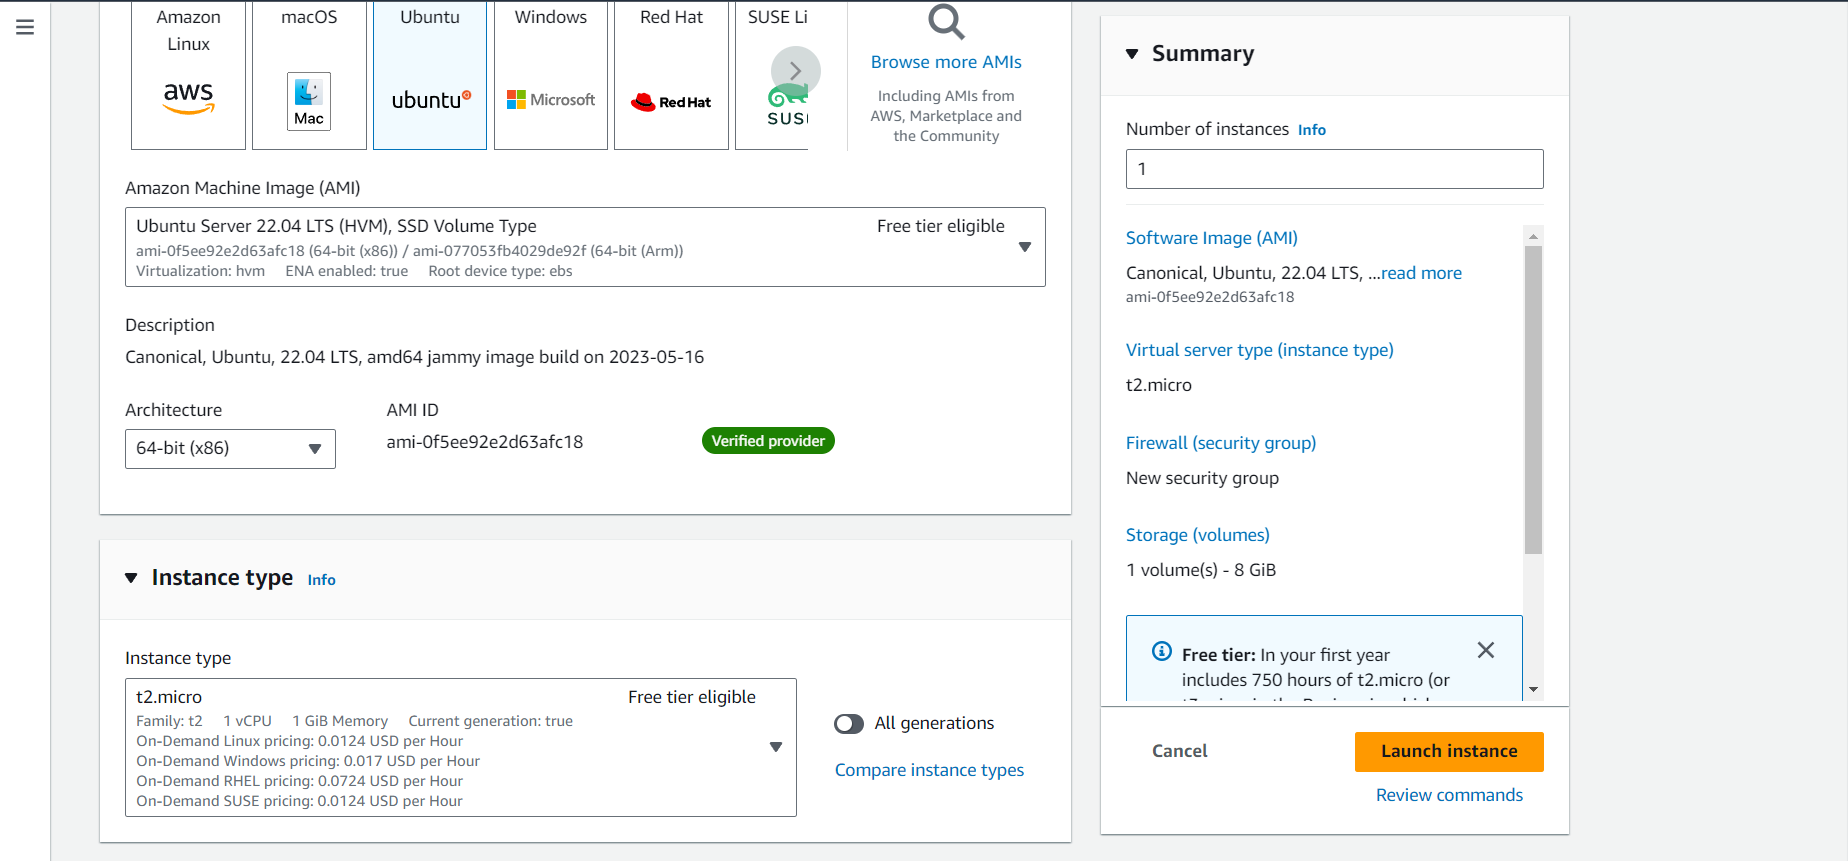
Step 4: You must use a key pair to login into the instance, just click on ‘create new pair’, name it 'aws-login' and download the file.
Step 5: Leave everything else as it is and launch the instance.
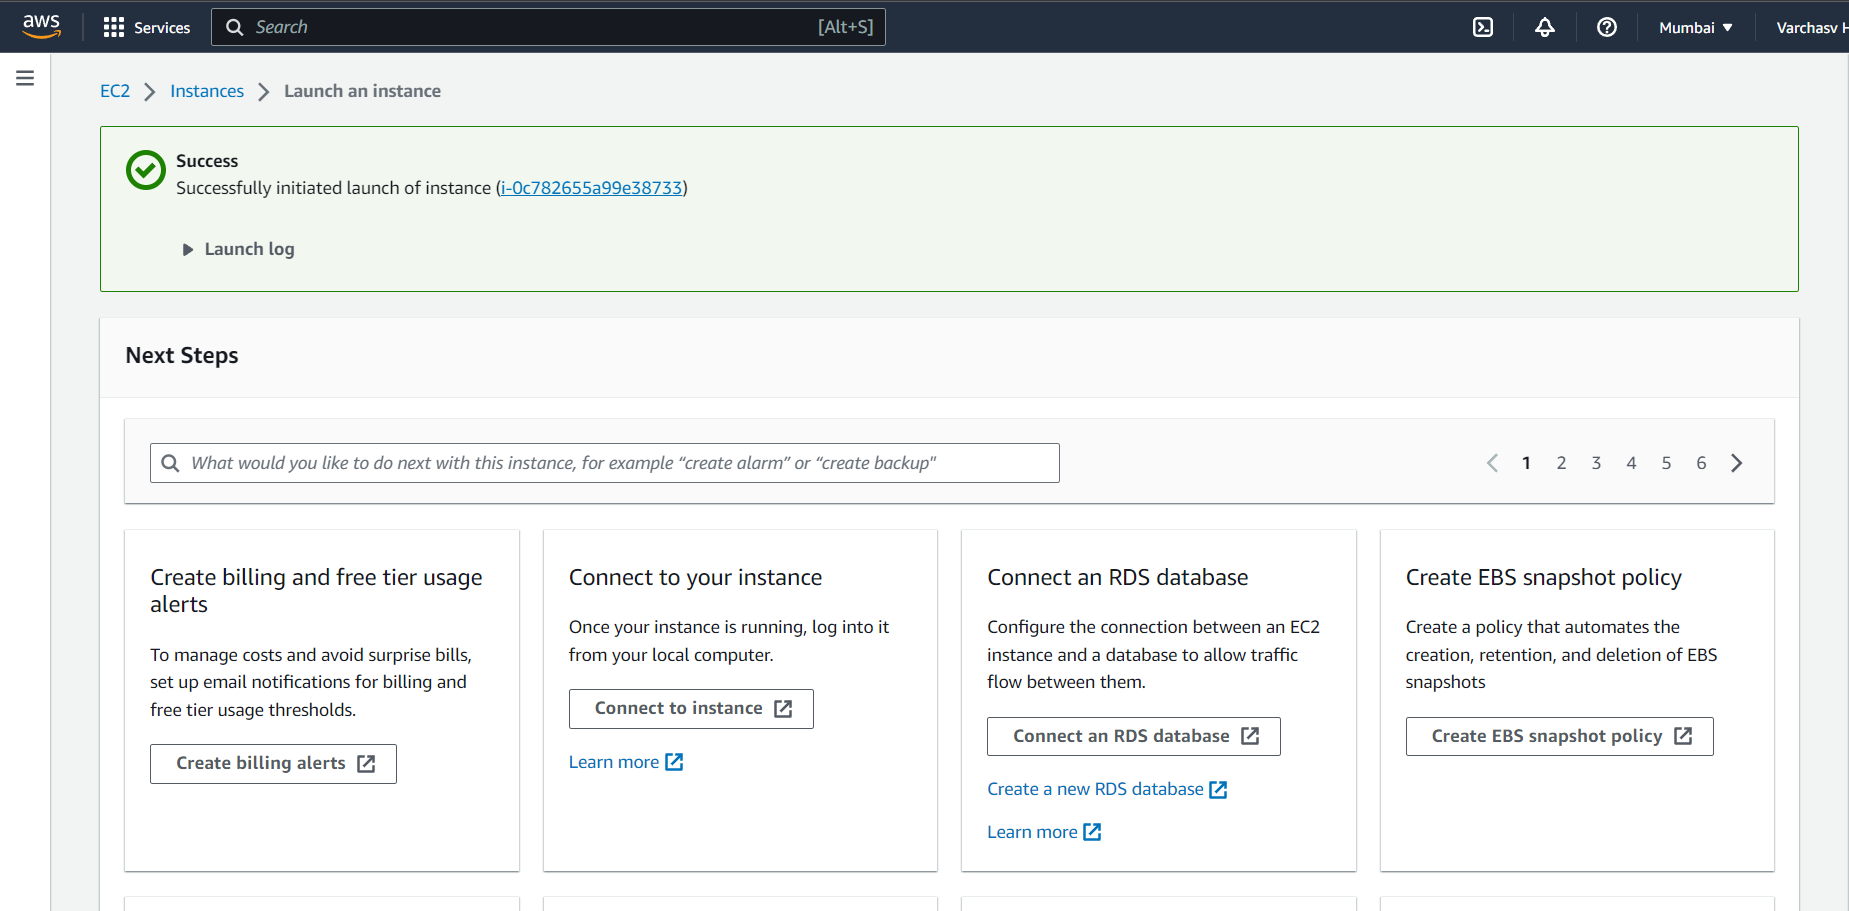
Logging into the instance
We are gonna login into this instance with a terminal and the key-login pair that we downloaded earlier.
With the terminal navigate to the folder in which your key login pair was downloaded and run the following commands.
chmod 600 aws-login.pemssh -i aws-login.pem ubuntu@<Public-Ipv4-address>💡You can get your public ipv4 address by clicking on the instance name.
Deploying Jenkins on the EC2 instance
Update the instance
sudo apt updateInstall Java
sudo apt install openjdk-11-jdkTo Download Jenkins paste the following into your terminal
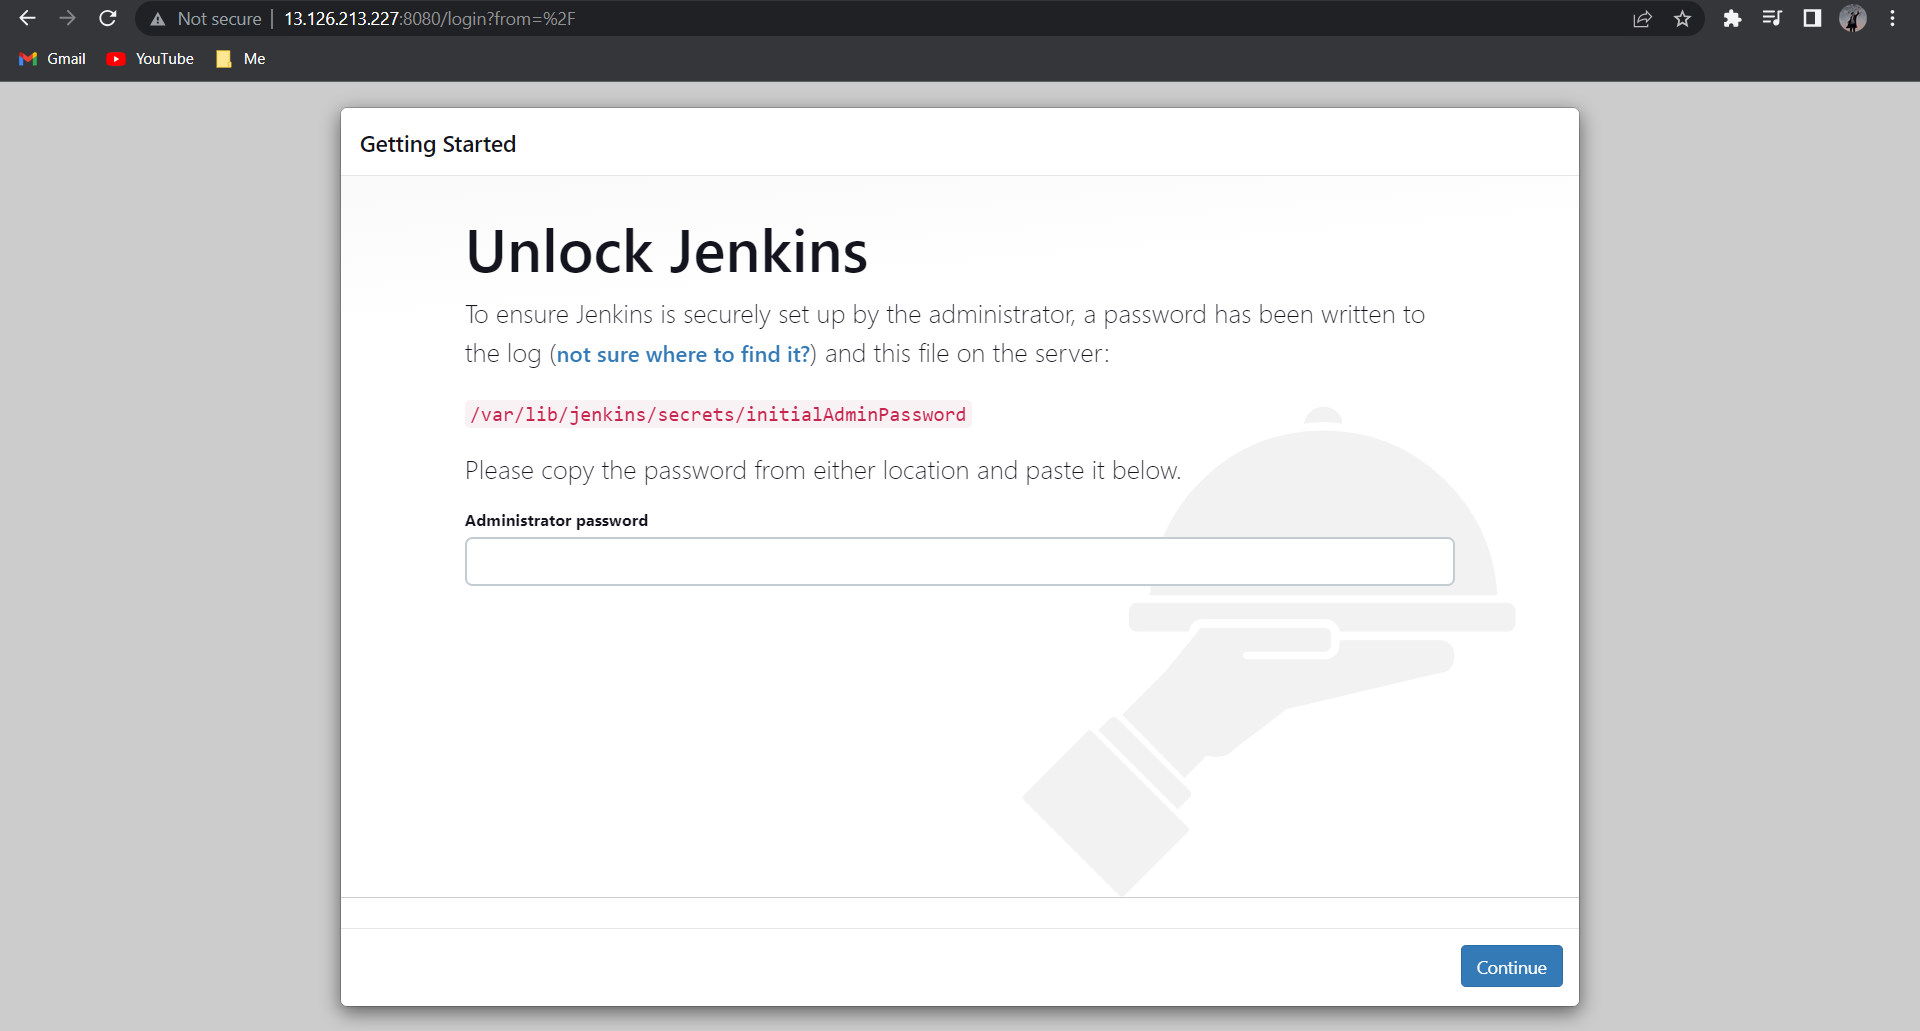
 curl -fsSL https://pkg.jenkins.io/debian-stable/jenkins.io-2023.key | sudo tee \
   /usr/share/keyrings/jenkins-keyring.asc > /dev/null
 echo deb [signed-by=/usr/share/keyrings/jenkins-keyring.asc] \
   https://pkg.jenkins.io/debian-stable binary/ | sudo tee \
   /etc/apt/sources.list.d/jenkins.list > /dev/null
 sudo apt-get update
 sudo apt-get install jenkins
Test if Jenkins is installed or not
systemctl status jenkinsTo Access Jenkins in our Browser, we need to make it accessible from the instance settings:
Go to the Security Groups>Edit inbound rules
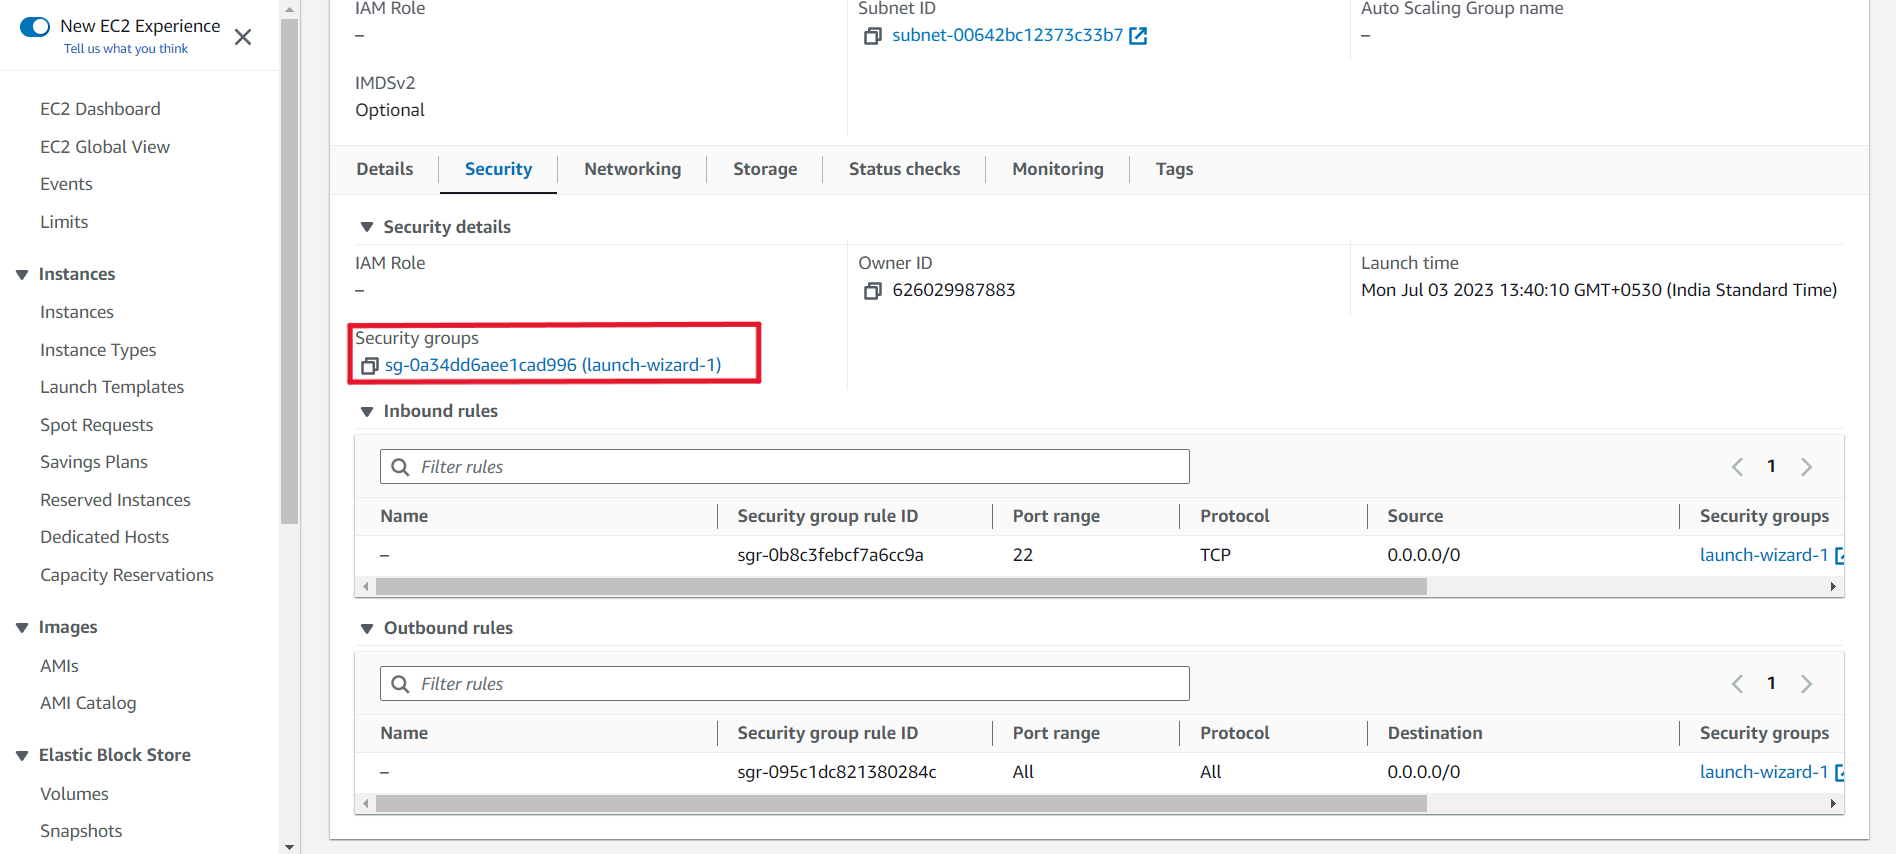
Add a new Rule, exactly like the following
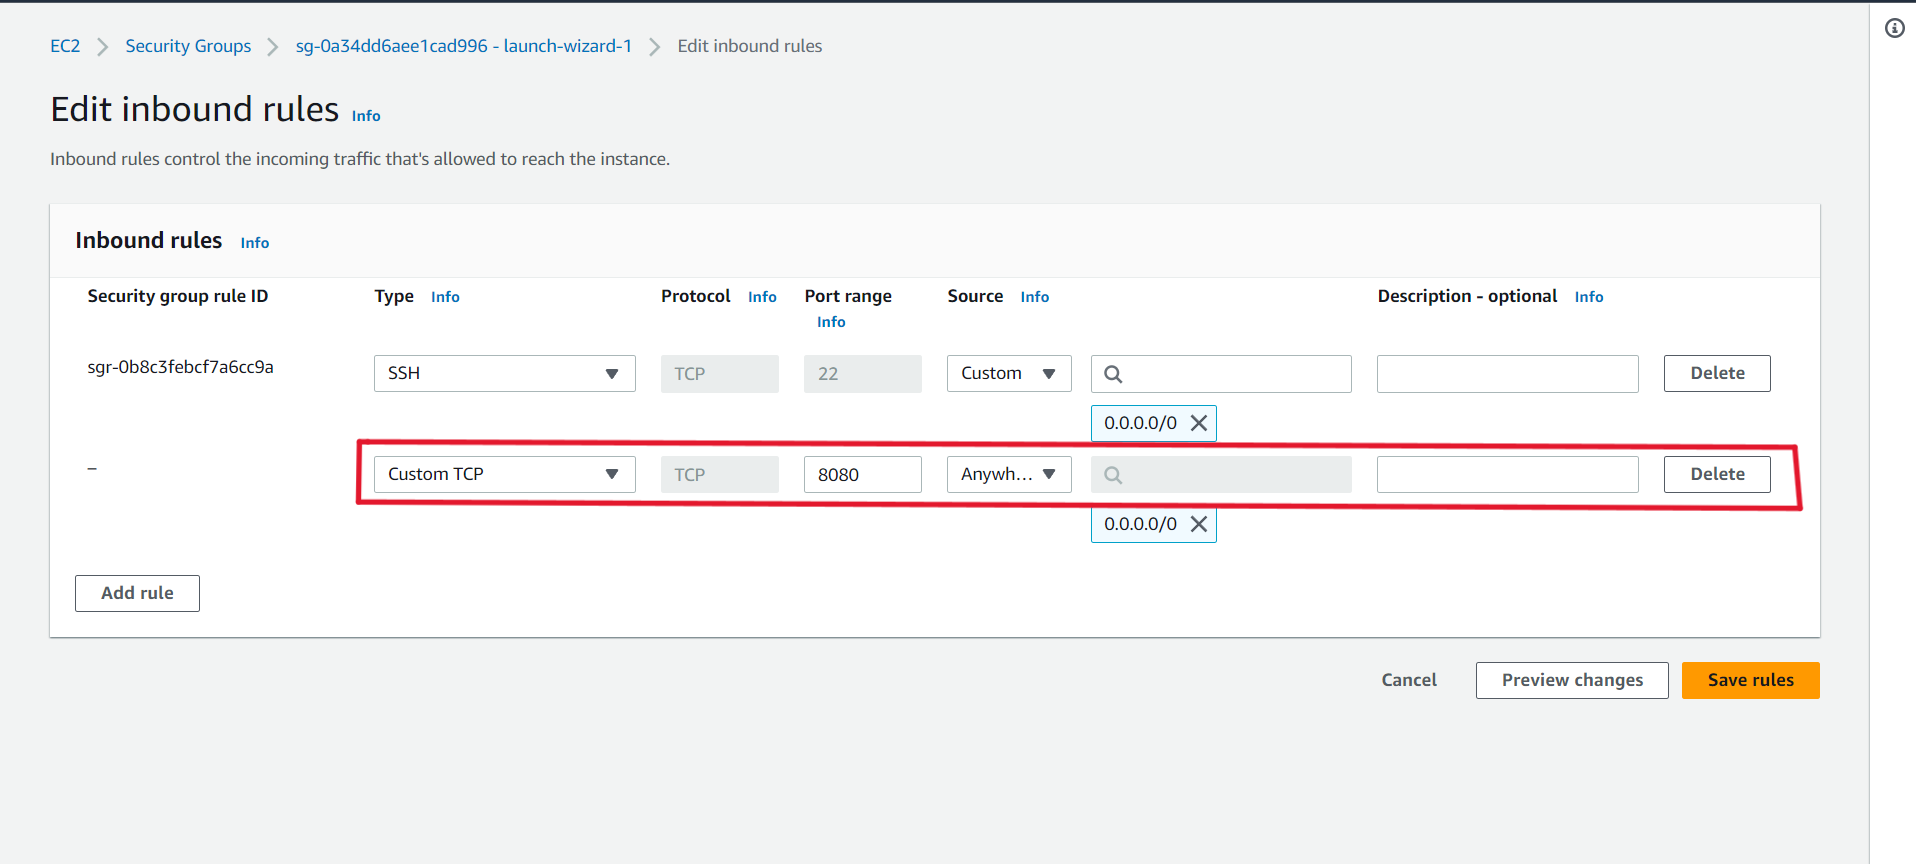
Jenkins is now accessible.
Conclusion😊
That was it for this blog, If you learned something new from it then please share it with your friends and colleagues.
Subscribe to my newsletter for more such blogs. THANKS!!!